
Cape Town, Hout Bay 2012.
Having had one successful build under the belt, I was ready to try a bigger, better and more sophisticated project – we also had a bigger budget. (It’s quite a common phenomenon that people build at least twice. You learn so much on the first project, that you’re often keen to try and better it the second time around).
We bought a relatively steep, very narrow plot just up the road from our last house and rented while we set about the 410m2 build.
This time around we used a well-known architect and neighbour, Darryl Croome (www.dcarch.co.za) with a very specific aesthetic that we felt would suite the location and estate guidelines.
Unfortunately, as is often the case, despite pushing for an earlier start, we were only ready to begin ground works at the end of May – rainy season!
What I thought would be a relatively small leveling cut into the erf, ended up being 180 truck loads of sodden mud that had to be removed. I think I budgeted for 40!
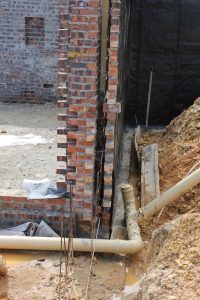
As the plot had a lot of ground water we insisted on using a pre-made, suspended slabs for most of the house. (This means the house does not sit on the ground, rather has an air pocket underneath.)
As the entire garage was partially submerged in the ground, I learnt a lot about triple cavity walls, waterproofing systems and French drains. You have to go top spec with this detailing as it’s not possible to fix once the foundations backfill goes in and construction starts.
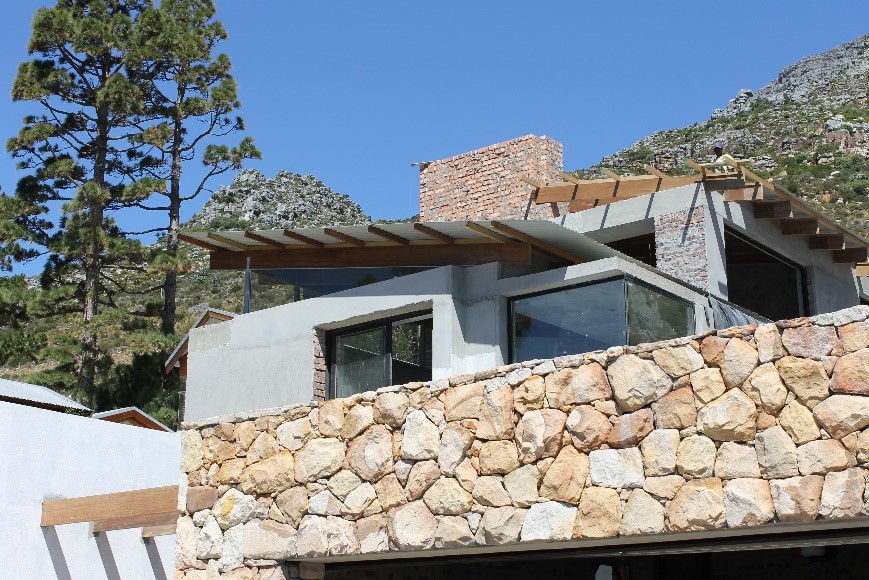
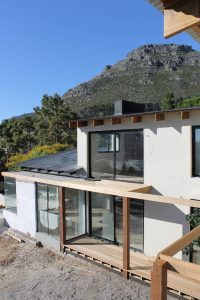
The mono-pitch roof design allowed us to maximise the mountain views with frameless glass panels. A sublime detail that can only be realized with good architectural specifications and experience.
Also, the first time we used external timber shutters. (The majority of the house faced South West to maximise the sea view, but resulted in a lot of afternoon heat and glare.) A worthwhile investment that also mellowed the house with a grey timber façade.
The good
- The combination of stone, steel, glass and timber made a spectacular combination.
- Framing views and creating privacy using corner windows, trees and shutters.
The bad
- I sourced my flooring directly from a timber supplier. Most of it was great, but some of the planks shrank or expanded in the sun, leaving some gaps in the flooring. Best to use a tried and tested flooring supplier.
- The extra earthworks and soil removal put a large dent in our budget in the first month. I’ve learnt that once earth is dug out the ground, it exponentially increases in volume.
The ugly
My one neighbor got nasty when building started due to her losing some of her view (despite all the plots in the estate demarcating future double storey areas and view lines to manage expectations) and we received nasty phone calls, screaming insults from across the wall and council inspections due to her complaint.
Fortunately, we had done everything well within the estate and city guidelines, but a very unpleasant experience none the less.
The final word
Despite a very tricky site, lots of rain to begin with and a very different building style, this project was a great success and a good financial move. So much so that we had to do it once more time.
For more on the next project, click here.